By Doormatic Technical Staff | Certified Door & Window Specialists, Woodbridge, ON
A rough opening should be 2 inches wider and 2⅝ inches taller than the finished door size — the top of the trimmer sits 82⅝ inches above the subfloor. This guide covers rough opening dimensions by door size and Ontario code notes for load-bearing walls. Doormatic handles door installation across Woodbridge and the GTA when framing is complete.
Key Takeaways
- Rough openings are larger than the finished door — 2 inches wider (1 inch each side for frame and shims) and 2⅝ inches taller (trimmer top at 82⅝ in above the subfloor for a standard 80 in door)
- Standard door height is 80 inches finished — the trimmer top sits 82⅝ inches above the subfloor
- Add 2 inches to door width for the rough opening — one inch of space on each side for frame and shimming
- Never assume an interior wall is non-load-bearing — load-bearing walls require an engineered header and an OBC permit
- Rough opening dimensions vary by manufacturer — confirm before cutting
Before You Start
Rough framing a door opening in a non-load-bearing interior wall of a house is a simple, manageable DIY task. Working in a load-bearing wall or an exterior wall requires permits and inspections under the Ontario Building Code.
Before you buy lumber, confirm the door swing direction — the hinge side of the rough framing must be plumb. You need: tape measure, level, speed square, circular saw, 3-inch framing nails or structural screws, king and jack stud lumber, header stock, cripple studs, and shims. For load-bearing walls, also have OBC span tables or an engineer’s header specification.
King studs run full height on each side. Jack studs support the header inside the king studs. The header spans the doorway — its size is determined by span and load. Never cut into a wall without confirming the wall type.

Framing Steps and Rough Opening Sizes
Rough opening dimensions vary by manufacturer.
| Finished Door Width | Rough Opening Width | Rough Opening Height |
|---|---|---|
| 24 in | 26 in | 82⅝ in |
| 28 in | 30 in | 82⅝ in |
| 30 in | 32 in | 82⅝ in |
| 32 in | 34 in | 82⅝ in |
| 36 in | 38 in | 82⅝ in |
Step 1 — Measure and Mark
Add 2 inches to the finished door width for the rough opening — the reason is this space accommodates the frame, shims, and expansion gap. A rough opening too tight leaves no room for adjustment — bear that in mind before cutting. Mark king stud locations at rough opening width plus 1.5 inches on each side. Mark the header height at 82⅝ inches above the subfloor. Measure diagonals to confirm square.
Step 2 — Install King Studs and Jack Studs
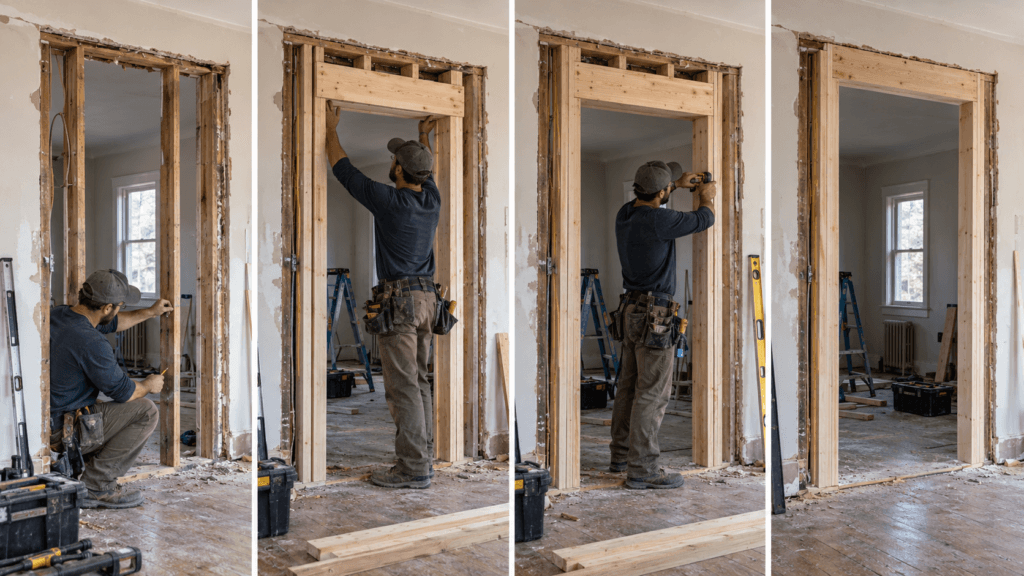
Fasten king studs full height with 3-inch framing nails. Fasten jack studs to the inside face of each king stud. The trimmer top should be 82⅝ inches above the subfloor. The hinge-side jack stud must be perfectly plumb — any lean transfers to the door’s swing. Shim under the foot at the floor if a stud leans. If any structural concern arises during framing — unexpected load paths, doubled top plates, or diagonal bracing — stop and consult a structural engineer before proceeding.
Step 3 — Header, Cripple Studs, and Bottom Plate
Cut the header between the king studs — doubled 2×4 for non-load-bearing walls; confirm size from OBC span tables for load-bearing walls. Set on the jack studs and fasten through the king studs. The head of the opening must be level. Install cripple studs at 16-inch centres. Cut the bottom plate: mark the jack stud faces, make a clean cut flush with a reciprocating saw, and check plumb, level, and square. A rough opening too tight once the frame is set leaves no room for shimming. For drafts after installation, see how to fix a drafty door frame.
When DIY Stops Being Sensible
Exterior door openings and load-bearing walls require professional assessment. Mistakes at the framing stage — undersized headers, non-plumb jack studs, incorrect rough openings — are expensive to fix after drywall is installed. Exterior doors must also meet OBC air-tightness requirements.
For context on garage door framing, see how to frame in a garage door.
For door installation in Woodbridge, Doormatic handles framing assessment and complete installation in a single visit.
What a Woodbridge Professional Does Differently
Doormatic’s process starts with a frame assessment — confirming wall type, verifying the rough opening, and identifying structural concerns before ordering. If the existing door or frame needs to come out first, see how to remove a door frame.
Every installation is checked for plumb, level, and square before the jamb is set. Doormatic carries structural screws, shims, and header stock on every job for same-day completion.
Frequently Asked Questions – Frame a Door Opening
What size rough opening do I need to frame a door opening for a 32-inch door?
A 32-inch door requires a rough opening of 34 inches wide and 82⅝ inches tall from the subfloor. This leaves room for the frame, shims, and adjustment. Confirm the exact width with your manufacturer — rough opening dimensions vary by specifications and frame thickness.
How do I frame a door opening in an existing wall?
Mark the rough opening, cut the drywall, and confirm the wall type before removing studs. Install king studs, jack studs, and a correctly sized header. Cut the bottom plate after framing is secure. Check plumb, level, and square. For load-bearing walls, obtain a permit and engineered header specification first.
Can I use the same size rough opening for a replacement door?
For a same size replacement, measure the existing rough opening and existing door — not the new door’s nominal size. A sound rough opening does not require re-framing. Confirm dimensions match the new door manufacturer’s specifications. Frames that are out of plumb or damaged should be replaced at the same time.
How do I know if my door frame rough opening is square?
Measure both diagonals from corner to corner. Equal measurements confirm square. If they differ, the frame is racked — adjust the king or jack stud and re-check. A racked opening causes the door to bind. It is essential the rough opening is square and plumb before setting the jamb.
About Doormatic
Doormatic is a Woodbridge-based door and window company providing professional door installation across the Greater Toronto Area. Our certified installers handle framing assessment, rough opening verification, and complete door installation — interior and exterior, new openings and replacements. Written quotes before work begins, no hidden charges.
Service Area
Doormatic serves Woodbridge, Vaughan, North York, Toronto, Mississauga, Brampton, Richmond Hill, Aurora, and King City. NAP: 180 Trowers Rd Unit 23, Woodbridge, ON L4L 8A6 · 416-722-6595 · info@doormatic.ca.
Next Step
Book a framing assessment or get a written quote. Door installation — Woodbridge and the GTA.